Visual Dictionary Freebie

Free visual dictionary
One of the things that I did this year as a companion to our DOL (daily oral language, ie. editing sentences) was to have students keep a visual dictionary for the homophones that we encountered. So if the sentence said:

i wants to no witch weigh it is to chicago

we would make all of the corrections and then make entries for the homophones in our dictionary. We did this together, and we started by writing the word and a quick phrase or definition to identify which one it was. Then we drew a simple picture to further identify it. It was ongoing throughout the year, and one of the pages ended up looking like this:
Free visual dictionary
I cutesied it up a bit and put it as a freebie. Click {here} to get it. I made it general so you could use it for whatever you wanted in whatever content area. Maybe you'd want to use it for word wall words or in a center or as review for a science test. The choice is yours!

Optimum Organization - Student Organization

One of the important things about being a fifth grade teacher is teaching kids how to be organized. Unfortunately, many kids still rely on teachers to remind them to finish an assignment or to take a note home. While many students aren't ready to be fully independent, there are some things that I do to help them take those steps towards independence. Unfortunately, I don't have any pictures for this post, but I'm hoping that you can visualize what I do.

The two buildings that I have taught in both invested in student planners for every student. It is a spiral-bound calendar that closely resembles a lesson plan book. In the front, we have included the student handbook (school policies, dress code, school calendar, etc.). The following pages are weekly calendars. The days are across the top and the classes are down the left side. At the beginning of the year, I walk through the calendar pages with the students and have them write in no-school days, early dismissal days (you know, the fun stuff), open house, the first several PE days (so they can bring appropriate clothing), and anything else we currently have on the calendar.

On a daily basis, I have the students fill in their planners with the day's topics. Here is one that I just made up in a spreadsheet as an example since I don't have an old planner.
I also have a planner, and I use my document camera to project it so they can copy it into their planners. This is what they might see on a Monday. Sometimes teachers have students write the work they will be doing that day, and some that don't have a lot of assignments have students write in I Can statements for the day (like in Science in this example). So here's what might be going on for this Monday. In Literacy, they will be doing some word work and reading chapter three in a novel. Maybe a vocab foldable will be part of the word work, and it will be due on Wednesday. Any homework, even it it's just what they're doing in class, is listed in the planner with an HW on the day it is due. After the assignment, students write "do" if they still have to do it, then add the "ne" to make "done" if they've turned it in to me. Many of you have told me that you are not allowed to give homework, and to be honest, I don't give much homework either. But sometimes students don't have enough time in class to finish an assignment, don't use their in-class time wisely, have band or chorus during study hall, or don't use their time in study hall at all. I consider any assignment that I expect them to complete and hand in as "homework," even if I don't expect them to take it home.

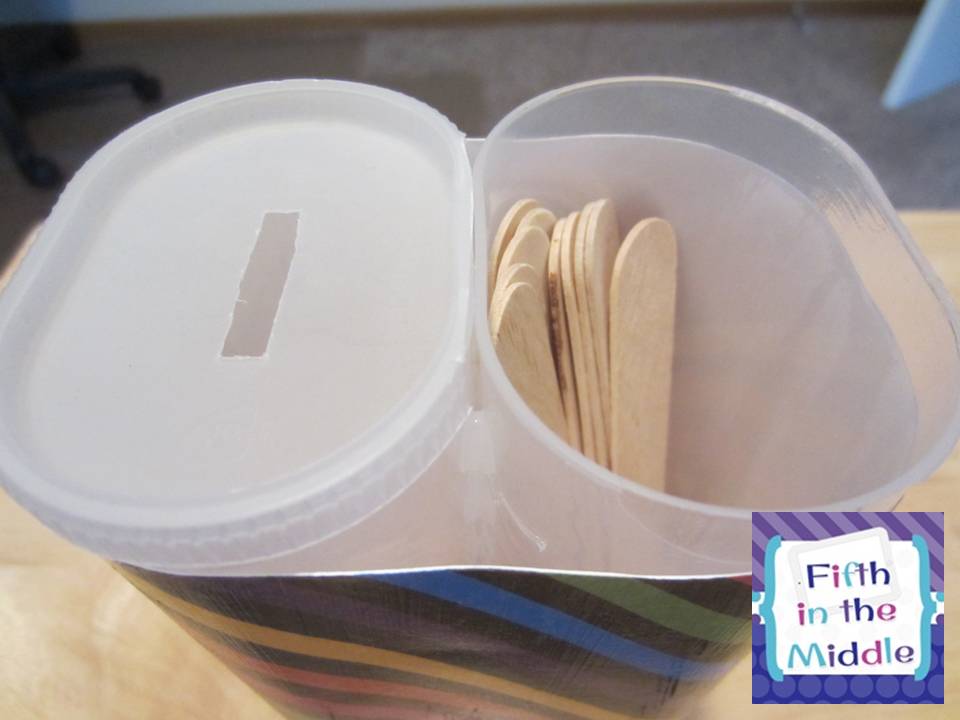
For those papers and things that I want them to keep in their desks because we use them as reference or we haven't finished discussing them, I have a color-coded system. Each student has red, orange, yellow, green, blue, and purple 2-pocket folders. I print out labels that has the students' names and subject area on them in the appropriate colors.
Wow, the colors in that picture are really horrible. Anyway, I cut the page into strips and each student sticks the labels on the appropriate-colored folders. The "notebook" and "journal" ones go on their spirals. This saves me a lot of time tracking down the owner of something, and it reinforces my color-coding. So if we are working on a Native American graphic organizer and don't finish, I say, "Put these in your red folders." The folders stay in their desks.

Now, this past year in the middle school, we tried putting their folders and everything else in a 3" binder. Same color-coding, but now the folders would travel with them. The thought was that they could always have what they needed in order to work on assignments during study hall or at home. However, about seventy-five percent of my students just crammed papers into their binders, not taking the time to put them in the appropriate folder, even with reminders. And they certainly weren't pulling out assignments during sixth-period study hall to work on them.

For next year, we are going to try going back to the individual, loose folders. They will be keeping them in their desks in their various classes, ie. keep their math folder in their math desk, science folder in their science desk, etc. Since we still switch classes every period, students will be carrying their pencils boxes, their planners, and one folder that will have take-home papers in the left pocket and to-do papers in the right pocket. Hopefully that will help them remember to check their folder during study hall to see if they have work. We'll see...

Throwback Thursday - Theme Projects

For this edition of Throwback Thursday, I'm going to share another popular post that might give some of you some summer project ideas.

*****************************************
Originally posted 7/30/12

Since I have no choice but to have a "fresh start" in my new classroom, I decided that I would overhaul everything. Looking around in blogland, and especially Pinterest, I feel a little pressured to have a classroom "theme." In my thirteen years of teaching, none of my coworkers or I had ever had a theme. Maybe it was because only fourth and fifth grades were in my building, and available pre-packaged themes seemed a little too primary.

But it seems that a theme doesn't have to be things like teddy bears or giraffes. It can simply be a color scheme. When I saw this package of scrapbook paper at Michael's, I thought that it would be a good basis for my classroom. It's bright, it's fun, and not too little kiddish.


So after searching through my pinned school project ideas, I decided to start with making new inserts for my binders. I can't find the online source of my inspiration, but here is the finished project.


To get this to work out, I had to print on the solid paper in the landscape format then trim to fit the width of the cover. Then I cut the patterned paper so that it overlapped with the solid paper by a centimeter or so and glued the three pieces of paper together. The label for the spine is a repeat of the binder title, but in one line.

While I was at it, I made labels for my tubs. Of course, I laminated them and stuck them on using my sticker maker.


 My next project was the DIY ruler holder from Classroom DIY. The only changes that I made to the instructions were to use Mod Podge instead of the spray adhesive (which I didn't have) and I trimmed the paper prior to adhering it. I also used Mod Podge to protect the paper and used the Mod Podge clear acrylic sealer to get rid of the tackiness. I had a bunch of empty formula canisters around, so I decided to do those as well.


Now that I think about it, my scrapbook paper was 8 1/2 x 11, so it wouldn't cover the Pringles can. I took two strips of coordinating paper to use at the top and bottom. The formula can needed one and one-half pieces of paper to get total coverage.

Next up was clothespins covered with the scraps of paper that I had generated up to this point. This inspiration came from a pin from Etsy. I started by Mod Podging clothespins to the scrapbook paper. I lined it up so that two edges were aligned with the edges of the paper so that I only had to cut two sides.


When they were dry, I used my craft knife to cut along the tip and far side. Then I clipped them to my cutting mat and gave them a few coats of Mod Podge.


Once I get into my classroom and scope out my walls, I will decide how many will get thumbtacks glued to the back and how many will get magnets. Maybe some will stay plain :)


So, that's been keeping me busy this summer. Now trying to figure out what curtains fabric will go with all of these bright colors!


Smashed Potatoes

Thank you for hanging with me during my hard drive crash. Lesson learned. And now I have (or will have tomorrow!) a new, non-school-owned MacBook Pro. When 90% of my school laptop's hard drive contains personal, non-school-related files, it's time to get my own. I think the tech department will thank me. In fact, they already have ;)

Anyway, today I'm sharing a yummy, easy side dish that we had for dinner last night. Here is the {pin} where I found it.

Ingredients (I didn't include amounts because it's flexible with how many you want to make):
small potatoes
olive oil
kosher salt
fresh ground pepper
herbs, optional
shredded cheese, optional


I don't know about you, but I always forget that I have potatoes until they start growing eyes. Don't judge me. So pre-step one, take the eyes off. Step one, boil them until they are fork-tender, ie. you can easily stick a fork in them.

Preheat oven to 450 degrees F. Drizzle olive oil on your baking sheet so they don't stick.

Put the potatoes on the baking sheet and give them enough room to spread after they are smooshed.

Take a potato masher or a drinking glass (which is what I did) and press down until the skin breaks and they spread out a bit.

Brush the top with more olive oil. I just sprinkled more oil on the top and used my finger to spread it out. BAD IDEA. Hot potato + oil = hot oil and therefore a burnt finger. Duh.

Sprinkle on kosher salt and fresh ground pepper to taste. If you're a fresh-herb-type person, feel free to add that during this step as well. I'm not that person.

Stick in the oven for 20-25 minutes until they are crispy.

My husband ate two before I got this picture taken. If you are a cheesy person *raising hand*, sprinkle shredded cheese on the top and let it melt.

That's all there is to it. Enjoy!

Also, there is still time to get in on my surprise goody box for my 500 follower giveaway.

a Rafflecopter giveaway

Optimum Organization - Tracking Late/Missing Assignments


This week I'm going to share how my team keeps track of students' late/missing assignments and making sure that we follow through with the consequences.

First of all, here is a review of our assignment policy. It applies to work done in class as well as any assignments that we send home. It resets at the quarter, and students who didn't go beyond the Oops get to be in our {No Late Work Club} party.

1st Late Assignment - Oops
2nd Late Assignment - 15 minutes after school
3rd Late Assignment - 30-minute lunch detention
4th Late Assignment - 45-minute after school detention
5th+ Late Assignment - 45-minute after school detention and ASP 3x/week

Our kids rotate between at least three teachers. We wanted kids to know that we were communicating with each other. I created a Google spreadsheet with all of the students and consequences listed. I shared the spreadsheet with the other teachers so we all had access. When a student had a late or missing assignment, that teacher entered the assignment information under the appropriate consequence. We also have the locker listed because we put locker signs on the lockers of the students who qualified for the party. We also incorporated behavior into the last party of the year, so that's why you see the behavior column. It has worked pretty well this year and plan to continue it next year!

And isn't it funny that something so simple turns out to be a huge hit?! My post on the {name stick holder} from last week currently has 2300 views! The power of Pinterest :)

Throwback Thursday - Milk Crate Seats

I am very excited about this linky because I can do it even though my hard drive crashed! This week I am going to revisit my most popular post - milk crate seats. The only thing that I would change is to use a thicker shower curtain on the last step. Other than that, they worked very well as seats AND as storage!

************************************************
Originally posted 8/6/12

After much procrastination, I finally got around to making my milk crate seats for my classroom. I can't remember the countless places where I got my inspiration for my version, so please let me know if something sounds familiar.

The main problem I had in getting these seats started was finding fabric I liked that went with my theme. I didn't want another pattern clashing with my other projects, but I really didn't want solid color either. Then somewhere along the way, I thought that a plastic tablecloth would be the way to go so I could wipe it off. But it had to be durable enough for fifth graders. So yeah, that was a challenge.


So here's what I did.  I used:
  • 12"x12" milk crates from The Container Store (These were much sturdier than the cheap ones from any other store that I saw. The downsides are that they are a little more expensive, though I did get them on sale, and they don't have the inner lip on which to rest the seat.)
  • 14"x14" pre-cut pieces of 1" thick foam (I was thinking that I wanted the seats to be 14"x14" because my seats would have to sit on top of the crates. Lo and behold, Hobby Lobby had pre-cut pieces of 14"x14" foam! Score!)
  • 14"x14" pieces of wood (I think mine are 1/2" thick. I can't remember. Everything in that aisle at Lowe's was a blur. Overwhelming!! Luckily, the guy at Lowe's cut them to 14"x14" for no additional charge.)
  • clear plastic shower curtain liner, cut about 16"x16" each
  • fat quarters of fabric (18"x21")
  • zip ties (Yeah, so those didn't work for me. I'm going to see if I can cut some 12"x12" squares of wood and glue them or otherwise attach them to the bottom of the seats to keep them from sliding.)
  • staple gun with LOTS of staples (Man! These used to freak me out, but I used them a bunch this summer and have gotten over my fear...kind of.)
Now, most places I've read suggest using spray glue to attach the foam to the board. Since I didn't have any, I didn't do that. And, if both things were 14"x14", why didn't they totally match up?! Anywho...Staple the edges of the fabric to the underside of the board.

Cover with pieces of the shower curtain and staple again. I retrospect, maybe I should have gone with a vinyl tablecover or something thicker.


Staple two zip ties to the underside of the seat where the board will rest on the crate. Place seat on the crate and tighten ties (not too tight, or you won't be able to open it far). (This is what I get for writing this up before I'm totally done - the staples were not strong enough to hold the zip ties in place and they came off almost immediately. Since the holes were farther down on the crate than I thought, I'm okay with this not working.) Plan B - Attach the 12"x12" wood squares to the underside of the seat. No picture yet, because my dad will be helping me with this part this week.

I will be keeping a clipboard (if it fits) and a mini pencil box with pencils and highlighters inside. I considered stapling a pencil pouch to the underside of the seat to hold small supplies, but the mini pencil boxes were cheaper.

In summary, I probably spent $15 per seat, and I'm not sure that I'd do this again. But, they are cute and match my room. Just hope that they don't get destroyed the first week! Pretty sure the first student to poke a hole in them will get a detention. Fair warning...

Name Stick Holder

Use empty Crystal Light containers to create a name stick holder.
I stumbled onto this great idea from {Griffith's 3rd Grade Garden}.

I pull names throughout the day for various things. I'm sure that many of you do the same. I used a mug to hold the sticks for the first thirteen years, and I rubber-banded together the sticks for the other class that I saw once a day. This year, my mug wasn't big enough for three classes, so I bought little buckets from THE dollar spot.
They worked fine. They were a little awkward. I probably could have put all three classes into one and just used rubber bands again. Anyway, occasionally I would have an issue with putting a stick down somewhere or having a pile of sticks on my table or sticks falling to the floor.

So this idea is brilliant! You take a stick out of one side, then place it into the side with the lid. When you are out of sticks, switch the lid to the other side and start over. Genius! No more misplaced sticks or stick piles!
Use empty Crystal Light containers to create a name stick holder.
Draw a stick from the open side.
Use empty Crystal Light containers to create a name stick holder.
Place the drawn stick in the side with the lid.
Use empty Crystal Light containers to create a name stick holder.
When all sticks have been drawn, switch the lid to the other side.
Use empty Crystal Light containers to create a name stick holder.
Ready to draw names!
Use empty Crystal Light containers to create a name stick holder.
Here's how I did mine. I got two of the taller Crystal Light containers and hot-glued them together. You will need the taller size if you use craft sticks like mine. (The pictures with the animal print paper show the smaller size, which I'll have to use for something else...)
Use empty Crystal Light containers to create a name stick holder.
Then I trimmed some scrapbook paper to 5 3/4" tall. I ended up using the extra paper to fill a gap on the end because the paper wasn't quite long enough.
Use empty Crystal Light containers to create a name stick holder.
I Mod Podged the paper onto the containers and then used a spray-on sealant to reduce the tackiness. I know that the blog where I found this idea just used a ribbon, but sometimes I draw sticks and want to keep it a {secret}. The opaque containers weren't secretive enough, in my opinion. Thus, the scrapbook paper comes into play.
For the lids, I made two different versions since I had two lids. The one on the right has a 1"x1/4" slit in it to fit the larger craft sticks. The one on the left has a starburst cut in the middle. I'll figure out which one I like better. I think that the one on the right is in the lead. The one of the left makes a wood-on-plastic noise when I pass the stick through.

UPDATE: When I cut the slits in the lids, I started by taking my exacto knife (or you could use a pin) and made little dots to outline it. If I just started cutting with the knife, the cut spread like a crack on a windshield. I learned to go slow and make little cuts first. Hope that helps!
Since I glued the two containers together, I made a little notch on the side of the lid so I wouldn't have to worry about getting the lid between the two containers to make it fit. The picture shows the lid before I made the slot in the top. Also, the blogger who was the source of this idea also wrote something on the lid so she would know which side was which. I think it's fine without it.
Use empty Crystal Light containers to create a name stick holder.
I made three, one for each class. I will use my new Silhouette Portrait (when the hard drive on my laptop has been recovered) to put a label on each of the wider sides, but I can't decide if I'm going to put on a number for the hour I have the class or the initial of the class's homeroom teacher. I'm trying to decide which would be more constant from year-to-year. Probably the homeroom teacher's initial.
Use empty Crystal Light containers to create a name stick holder.