How to Create Brag Tags

This post walks you through the steps of creating brag tags by creating a master tag and inserting it into a PowerPoint template.
Part of the fun of using brag tags in your classroom is creating your own to go with the special things that you do in your classroom. For example, our school has a traveling trophy for the class who gets the most PBIS tickets each week. That tag is on the right end in the above picture.

In this post, I'm going to be going through the steps on how to create your own brag tags using my template. Clicking on the picture below will take you to the template.
PowerPoint 2011 template to design and create your own brag tags
Dimensions
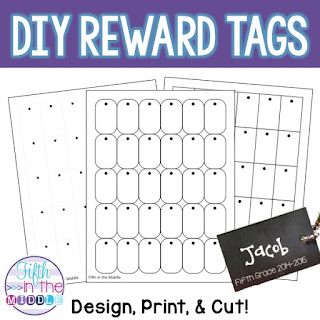
The first step is to decide what the dimensions of your tag will be. I prefer a smaller size (1.25"x2") as shown in the picture above, but I know that primary teachers tend to create bigger tags.

Open the file with the name that starts with the desired dimensions. This is your master template.

Design
Now is the fun part! Using your own clip art and fonts, design your tag. Lots of great fonts and clip art can be purchased on TeachersPayTeachers.

Once you have designed your master template, you are ready to insert it into the template sheet. Open the DIYRewardTagsPPTTemplate file and go to the slide with the tag dimensions that you need.

Now, watch this video to see how to save and insert:

Finishing
After your sheet of tags is ready, it's time to print! I prefer printing on cardstock, laminating, then cutting and punching holes, but your time and budget will determine what's best for you.

Have fun!

If you would like to see my current collection of brag tags, {click here}.
This post walks you through the steps of creating brag tags by creating a master tag and inserting it into a PowerPoint template.
You may also be interested in {Brag Tags: Tips for Set-Up and Storage} and {Brag Tags Part 2: FAQ and Troubleshooting}.

Five-Minute Math Fillers

Use these quick math fillers when you have 5 to 10 minutes
How many times do we have an extra five or ten minutes before recess, lunch, or dismissal? I always keep a list near my teaching podium with a few time fillers for these situations. Most of them require little to no prep!
Guess My Number (Mastermind) is a fun way for students to use logic to fill 5-10 minutes!
Guess My Number (Mastermind)
Skill: Logic
  • Teacher Materials Needed: Whiteboard or projector
  • Student Materials Needed: -None-
Directions:
  1. Think of a 3-digit number and write it down so you don't forget. The number should have 3 unique digits, i.e. 305 instead of 355.
  2. Call on a student to guess the number.
  3. Write down the guess so everyone can see it.
  4. Record how many of the guessed digits are in your number.
  5. Record how many of the guessed digits are in the correct place value.
  6. Keep collecting guesses until correct.

Multiplication Tetris uses basic facts and spatial reasoning to create a fun class competition.
Multiplication Tetris
Skills: Basic multiplication facts, spatial reasoning
  • Teacher Materials Needed: 2 dice, projector (optional)
  • Student Materials Needed: Blank grids (I use 10x16 grids), writing utensil
Directions:
  1. Roll the dice. Either call out the numbers and/or project the dice.
  2. Students trace a rectangle with the rolled dimensions and write the corresponding multiplication problem inside.
  3. Continue rolling until students can no longer make the rolled dimensions fit in their grids.
Variations:
  • Draw names after a few rolls. If those students have been able to make them all fit, let them line up first/get their backpacks/get a small treat. Continue rolling and drawing names.
  • Use paper with more squares and 10-sided dice {Amazon affiliate link}.
Quick problems are a differentiated way to fill those extra 5 to 10 minutes before recess, lunch, or special.Quick problems are a differentiated way to fill those extra 5 to 10 minutes before recess, lunch, or special.Quick problems are a differentiated way to fill those extra 5 to 10 minutes before recess, lunch, or special. 
Quick Problems
Skill: Varies, problem solving
  • Teacher Materials Needed: Whiteboard
  • Student Materials Needed: Dry erase marker and dry erase board -or- paper/sticky note and writing utensil
Directions:
  1. Write two problems of differing levels of difficulty on the board.
  2. Let the students choose which one to solve on their desks or sticky notes.
  3. Check them while they're at recess or special.
  4. Put the answer keys on the board.

Quick images provide a perfect opportunity to practice spacial reasoning and listening to others.
Quick Images
Skill: Spatial reasoning, flexible thinking, listening to others' reasoning
  • Teacher Materials Needed: Projector, images made in advance
  • Student Materials Needed: -None-
Directions:
  1. Show an image of dots on the projector for a few (2-3) seconds and then cover it up or take it away. Make sure that it is NOT enough time for them to actually count them one by one.
  2. Give students a few moments to figure out how many dots they saw.
  3. Optional - show the same image a second time for a few more seconds.
  4. Go around the room and call on volunteers to tell how many dots they saw. Students can either repeat what another student said or give some sort of signal to show that they got the same thing.
  5. Show the image again and leave it up.
  6. Count the actual number of dots.
  7. Choose students to describe how they counted/grouped the dots. This is the essential piece. Ask them to be as specific as possible.
  8. Occasionally ask another student to explain how the previous student counted them.
True/false equations are a quick time filler
T/F Equations
Skill: Reasoning
  • Teacher Materials Needed: Equations and non-equations, whiteboard or projector
  • Student Materials Needed: -None-
Directions:
  1. Write equation or non-equation on the board.
  2. Give students time to think about if it is true or false.
  3. Call on students to explain their thinking.
Mental Math
Skill: Mental Math, verbalising thinking
  • Teacher Materials Needed: Whiteboard or projector, math problems close to landmark numbers or combinations of 10
  • Student Materials Needed: -None-
Directions:
  1. Write problem on the board.
  2. Give students time to solve it mentally.
  3. Call on 2-3 students to explain their thinking as specifically as possible. Write down their processes.
Use these quick math fillers when you have 5 to 10 minutes


Low-Prep, Low-Stress Testing Treats

Four low-prep testing treats to give your students
I browsed through Instagram, Pinterest, and Facebook looking for ideas for testing treats for my students this year. I knew that I didn't want candy, but I did want something that was a) gluten-free and b) something that could potentially double as breakfast for students who didn't take the time to eat before coming to school (for one reason or another).

After not seeing much that satisfied both criteria, I headed to the grocery store to wander the aisles. Luckily, the cereal aisle had a bunch of options that would work. I surveyed the shelves and chose three cereals with names that would lend themselves to some sort of cheesy pun that my fifth graders would either think was a) funny/clever or b) so lame that rolling their eyes would cause them to pull an ocular muscle. (I ended up buying Chex, Cheerios and Lucky Charms if you can't tell from the picture. A few days later, I remembered that we had four days of testing, so I quick ran to the store for fruit snacks.)

Now, as cute as all of those individual bags with their bag toppers were, I knew that I had no chance of accomplishing such a feat in one night. (Did I mention that I waited until the last minute?) If I did devote my night to it, I knew that I would be completely discouraged when the students looked at it for maybe five seconds before tearing into it. So the idea of just making one sign was born.

Also, I decided to go with paper bowls instead of paper cups or Ziploc bags for a few reasons. I couldn't justify using so many Ziploc bags during Earth Day week, and I knew that paper cups would be spilled in 0.2 seconds. Bowls would be reusable and less likely to tip. (This ended up being a pretty decent plan.)

For setup, I just put the students' numbers on the bowls, dumped in the cereal, and arranged my bowls around the sign. Students took the bowls and returned them to the table for the next day. Easy. Stress-free.

If you would like the set of signs that I used, please click any of the images below!
 Remember to Re-Check Your Work - Chex cereal as a testing treat
Cheering You On - Cheerios as a testing treat
 No Luck Needed, You'll Do Great - Lucky Charms for testing snack
 You've Done Berry Well - Fruit Snacks as a testing treat

Get easy access to all of my free resources and subscribe to my mailing list!

* indicates required