Hello everyone! I'm Mrs. Smith from Performing in Fifth, and I'm super excited to be guest posting on Fifth in the Middle today! In my teaching career, I've taught grades 4-7 and been a reading interventionist. I currently teach Language Arts grades 4-6.
I began experimenting with interactive notebooks several years ago when I taught 5th grade, and I've fallen in love with them. When used correctly, you will see a huge jump in student achievement because they will remember these hands-on activities and love their notes so much that they will actually use them! I'm here to talk to you today about procedures you can implement in your classroom to ensure that you have a pleasant notebooking experience!
Procedure 1: Setup and use a Table of Contents
Walk your students through how to setup a table of contents before you do any lessons in your interactive notebook. Having a printed page with all of the standards for that subject/grade level makes it easy for students to add page numbers as they complete each lesson. I model this procedure for adding the page numbers to the table of contents after every lesson. It's important that students are reminded to do this, so that they can easily access information in the future!

Procedure 2: Efficient Cutting Strategies
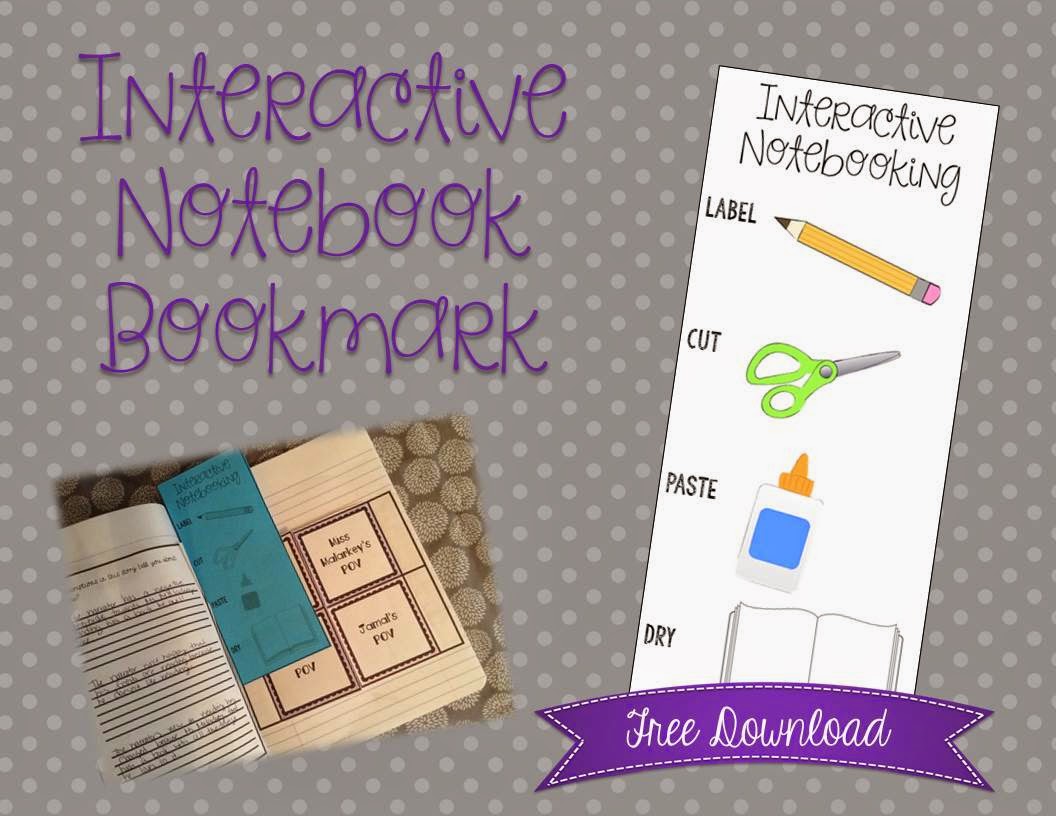
The first part of this procedure is to have supplies ready. I keep the scissors in a bin in the middle of the desks. My students have 60 seconds to have supplies out and pages open and labeled. We've used post-it notes, ribbons, and other items to mark the next page in the notebook, so that students can open to that page quickly. Check out my bookmark freebie at the end of this post for a nice way to bookmark your notebook pages!
The second step of this procedure is the cutting. If you have younger students, you will have to set more time aside for this step, or you may want a parent volunteer to pre-cut some of the pieces. With my 4th-7th grade students, I set a timer for 5 minutes. I prefer to use a digital timer that I can project onto the board so that students can see how much time they have left. If you have a student with special needs, assign them a partner or provide them with pre-cut pieces.
What do you do with all the trash? I have two medium shipping boxes that my helpers take around the class to pick up all of the pieces. They empty the shipping boxes into my large recycle bin, which I take out once a week. These helpers also look for scraps on the floor that need to be picked up.
My class can have everything cut out and a clean working area in less than 6 minutes because I consistently remind them of our procedures. Yours can too with practice!
Procedure 3: Glue Use
With proper procedures, you will very rarely have a mess to clean up after notebooking. If you want these pages to stay put all year, you must have your students use liquid glue. It's a necessary evil. An important procedure to teach is how much glue to use. I tell my students to follow the "5 dot rule". They put four total dots of glue close to the outer edges to form a rectangle, and one dot of glue in the middle. I very dramatically demonstrate the difference between a dot and a glob the first day of school. Once everything is glued in, I have them leave the pages open to dry on the corner of their desks, just in case there is some stray glue. The last thing you want is to have two pages glued together!

Procedure 4: Absent Students
I keep a binder with several copies of each printable, organized by standard, as well as copies of my own notebook page so that they know what to do. They know to take a copy of everything they've missed, and stay in during lunch to finish it. It's also possible for them to take it home if lunch time doesn't work for you. Absent students are required to have an extra notebook check 24 hours after they return to school. I keep a list of absent students on my calendar that I check daily, and I highlight their names once I've seen their completed work. Keep yourself organized and it will be easy to ensure that absent students don't miss important notes!
Procedure 5: Using Interactive Notebooks
This procedure is key for the success of interactive notebooks in your classroom. Your students will learn a lot while they're putting their notebooks together, but they'll learn even more when they refer back to their notebooks daily for information. I love interactive notebooks because my students can use them as a reference to show them anything from step-by-step how to do a math problem, or a model of how to do a summary of their reading. That means less work for me AND more in-depth learning for them!
Before we do group work or independent practice, I tell my students which section their notebook should be open to for reference. Throughout the year, we play the Table of Contents Race, where I show them a problem or question, and they race to find the notes they need to complete/answer the question. If we're reviewing for a unit test, I teach the students that they have to show an effort to find the notes in their notebook before I will help them locate the correct information.
Model using your own notebook from time to time, and always praise students who use theirs correctly!
Are you planning to use interactive notebooks in your class next year? Download my interactive notebooking bookmark to remind your students of the procedures, and to help keep their place!
The first part of this procedure is to have supplies ready. I keep the scissors in a bin in the middle of the desks. My students have 60 seconds to have supplies out and pages open and labeled. We've used post-it notes, ribbons, and other items to mark the next page in the notebook, so that students can open to that page quickly. Check out my bookmark freebie at the end of this post for a nice way to bookmark your notebook pages!
The second step of this procedure is the cutting. If you have younger students, you will have to set more time aside for this step, or you may want a parent volunteer to pre-cut some of the pieces. With my 4th-7th grade students, I set a timer for 5 minutes. I prefer to use a digital timer that I can project onto the board so that students can see how much time they have left. If you have a student with special needs, assign them a partner or provide them with pre-cut pieces.
What do you do with all the trash? I have two medium shipping boxes that my helpers take around the class to pick up all of the pieces. They empty the shipping boxes into my large recycle bin, which I take out once a week. These helpers also look for scraps on the floor that need to be picked up.
My class can have everything cut out and a clean working area in less than 6 minutes because I consistently remind them of our procedures. Yours can too with practice!
Procedure 3: Glue Use
With proper procedures, you will very rarely have a mess to clean up after notebooking. If you want these pages to stay put all year, you must have your students use liquid glue. It's a necessary evil. An important procedure to teach is how much glue to use. I tell my students to follow the "5 dot rule". They put four total dots of glue close to the outer edges to form a rectangle, and one dot of glue in the middle. I very dramatically demonstrate the difference between a dot and a glob the first day of school. Once everything is glued in, I have them leave the pages open to dry on the corner of their desks, just in case there is some stray glue. The last thing you want is to have two pages glued together!
Procedure 4: Absent Students
I keep a binder with several copies of each printable, organized by standard, as well as copies of my own notebook page so that they know what to do. They know to take a copy of everything they've missed, and stay in during lunch to finish it. It's also possible for them to take it home if lunch time doesn't work for you. Absent students are required to have an extra notebook check 24 hours after they return to school. I keep a list of absent students on my calendar that I check daily, and I highlight their names once I've seen their completed work. Keep yourself organized and it will be easy to ensure that absent students don't miss important notes!
Procedure 5: Using Interactive Notebooks
This procedure is key for the success of interactive notebooks in your classroom. Your students will learn a lot while they're putting their notebooks together, but they'll learn even more when they refer back to their notebooks daily for information. I love interactive notebooks because my students can use them as a reference to show them anything from step-by-step how to do a math problem, or a model of how to do a summary of their reading. That means less work for me AND more in-depth learning for them!
Before we do group work or independent practice, I tell my students which section their notebook should be open to for reference. Throughout the year, we play the Table of Contents Race, where I show them a problem or question, and they race to find the notes they need to complete/answer the question. If we're reviewing for a unit test, I teach the students that they have to show an effort to find the notes in their notebook before I will help them locate the correct information.
Model using your own notebook from time to time, and always praise students who use theirs correctly!
Are you planning to use interactive notebooks in your class next year? Download my interactive notebooking bookmark to remind your students of the procedures, and to help keep their place!
Thank you Diane for allowing me to share my interactive notebooking tips!